DISCLAIMER: while we keep this post for reference, we
strongly discourage the use of proprietary software, since it violates fundamental user freedoms.
Contents of the post:
- Creative Live! Cam Vista IM and Skype (Ubuntu 10.10+)
- Creative Live! Cam Vista IM (Debian Lenny e Ubuntu)
- Creative WebCam Live! (Ubuntu 8.10)
Creative Live! Cam Vista IM and Skype (Ubuntu 10.10+)
In order to make the webcam also compatible with Skype, one needs to install the
gspca driver and libv4l.
Installing needed packages:
sudo aptitude install mercurial build-essential linux-headers libncurses5-dev
Retrieving sources (from
Douglas Schilling Landgraf V4L/DVB backports repository):
hg clone http://linuxtv.org/hg/v4l-dvb/
Copy the configuration file:
cd v4l-dvb
sudo cp /boot/config-`uname -r` v4l/.config
Note: currently FireDTV drivers do not compile easily (you need all the kernel sources) and are rarely used, we will disable them in the configuration.
Launch configuration:
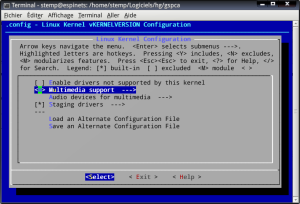
sudo make menuconfig
Disable FireDTV support (Multimedia Support -> DVB/ATSC adapters -> set the option blank on FireDTV and FloppyDTV):
Exit, Exit.
Now let’s take care of usb webcams (Multimedia Support -> Video Capture adapters -> V4L USB devices)
Activate new modules drivers (press M on those marked NEW), in gspca for example:
Once the new drivers are enabled (M for module instead of a space), we can leave. Exit, Exit, etc… and save:
Launch the compilation:
make
sudo make install
If everything ok go to the next step, because the drivers also require the latest versions of libv4l.
For karmic it’s easy:
sudo add-apt-repository ppa:libv4l
Get the latest version if necessary:
sudo aptitude update
sudo aptitude full-upgrade
In order to load skype with the new drivers:
cd /usr/bin
sudo mv skype skype.real
gksudo gedit skype
add the following lines
#!/bin/sh
LD_PRELOAD=/usr/lib/libv4l/v4l1compat.so /usr/bin/skype.real "$@"
and make exxecutable the file
sudo chmod +x skype
Restart and enjoy your new drivers.
Ref:
Le bazar de Stemp,
Ispirazioni Informatiche .
Older versions
N.B. Con i kernel 2.6.27.xx le procedure sotto riportate falliscono. Esse si riferiscono ai kernel 2.6.24.xx.
Creative Live! Cam Vista IM (Debian Lenny e Ubuntu)
Scaricare il driver ov51x-jpeg (ad esempio tramite
subversion)
sudo aptitude install subversion
mkdir webcam-driver
svn co svn://rastageeks.org/svn/ov51x-jpeg/trunk webcam-driver
compilare
cd webcam-driver
sudo aptitude install linux-headers-`uname -r`
make
sudo make install
sudo modprobe ov51x-jpeg
installare il modulo del pacchetto
sudo aptitude update
sudo aptitude install ov51x-jpeg-source module-assistant
module-assistant a-i ov51x-jpeg
Per utilizzare la webcam con skype (versione 2.0.0.72) è necessario forzare un parametro all'avvio, inserendo nel file
/etc/modprobe.d/options la seguente riga
options ov51x-jpeg forceblock=1
Nel caso di Ubuntu 8.04 o 9.04 è inltre necessario installare
libv4l
sudo aptitude install libv4l-0
e lanciare skype con il comando
LD_PRELOAD=/usr/lib/libv4l/v4l1compat.so skype
Conviene quindi rinominare l'eseguibile
sudo mv /usr/bin/skype /usr/bin/skype.real
e creare un file
sudo nano /usr/bin/skype
inserendo la riga
LD_PRELOAD=/usr/lib/libv4l/v4l1compat.so /usr/bin/skype.real
e renderlo eseguibile
sudo chmod 775 /usr/bin/skype
Ref:
ubuntu forums,
rastageeks,
fireteam.
Creative WebCam Live! (Ubuntu 8.10)
La Creative WebCam Live! viene riconosciuta da ubuntu 8.10 e funziona correttamente con alcuni programmi come
Cheese, ma skype 2.0.0.72 , pur riconoscendola, mostra una schermata verde invece del video.
E' quindi necessario installare il pacchetto
libv4l (o
lib32v4l per la versione amd64)
sudo aptitude install libv4l
rimuovere skype se già installato
sudo aptitude purge skype
e installare i
repository Medibuntu
sudo wget http://www.medibuntu.org/sources.list.d/intrepid.list --output-document=/etc/apt/sources.list.d/medibuntu.list
aggiungendo anche la chiave GPG
sudo apt-get update && sudo apt-get install medibuntu-keyring && sudo apt-get update
e quindi reinstallare skype da questo repository
sudo aptitude install skype
Ref:
Ispirazioni Informatiche.


