2016/06/03

Jitsi on Debian

Jitsi is a libre software (LGPL license) allowing encrypted instant messages (OTR protocol) and video conferences (ZRTP protocol). It looks as one of the most reliable solutions to have private conversations. It can be used to ensure that, e.g., personal informations are not leaked to third monitoring parties.

Jitsi runs on most common operative systems, and requires little encryption knowledge to set up secure calls. The interface is easy to use. Jitsi is in principle compatible with several protocols, including SIP, XMPP or Google Talk, but encrypted video calls may be in practice problematic with most protocol providers.

The webRTC based Jitsi Meet—also libre software, Apache License—is a remarkable solution (see the end of the post). Privacy is of primary importance to the project, and the software was used, e.g., to communicate with Edward Snowden during the Libre Planet 2016 keynote.

Installation on Debian

While the official documentation provide informations about Jitsi installation on Debian, the user is confusingly directed towards a repository containing several packages. Those packages are suggested to be installed before adding Jitsi's repository.

Instead of directly downloading and installing each package (and related dependencies), the easiest way to proceed for installation, is to simply add to following repository to /etc/apt/sources.list:
deb http://download.jitsi.org/deb unstable/

To avoid the GPG error warning, add the gpg key to your keyring:
# wget -qO - https://download.jitsi.org/nightly/deb/unstable/archive.key | apt-key add -

Optionally install Jitsi Meet (see more details below, though):
# apt-get install jitsi-meet
Install jitsi client:
# apt-get install jitsi

Launch Jitsi and login with your supported account.

At the following apt-get update there may be a warning for a duplicate Jitsi repository. To solve it, simply comment out the one added manually in /etc/apt/sources.list.

Issues

I got a `ICE failed' error probably depending on the protocol (Google Talk, XMPP, SIP) providers tested. According to the FAQ page, the problem may be solved by using an ippi account. Still, I could establish a secure OTR chat also with Google Talk and XMPP.

While on a secure chat with both ends authenticated through a Google Talk account, some instant message arrived unencrypted if, besides Jitsi, also the Google Talk Firefox plug-in was running at the same time. This is potentially compromising and would deserve more investigation. However, when Jitsi was the only active client on my desktop, the messages always arrived encrypted. Hence, as a general rule, while a secure chat is active it is advisable to close all Google Talk clients other than Jitsi.

I also encountered some graphical issues in Debian 8 'Jessie' using gnome. These are not serious enough to prevent the use of Jitsi, but still a bit annoying.
  1. First, when sending the secret question to authenticate the other user during a secure (OTR) chat connection, the window would not scroll down, preventing the expected secret answer to be written (I just left it blank).
  2. Second, when minimizing the window, it does not open again simply by clicking on the relative gnome activity bar icon. Need to right-click on the bar icon and choose 'jitsi' to open the window again.
  3. Third, a jitsi icon stays on a desktop corner (see below). Clicking on it has no action.


Jitsi Meet - Web Conferences

An istance of Jitsi Meet is also provided at https://meet.jit.si/, no installation required (if using Debian Iceweasel browser, note that Jitsi Meet needs version ≥ 40). It is based on the webRTC protocol and allows many functionalities, among which conference video calls, instant messaging, screen sharing, document sharing (Etherpad) and live streaming. More information about how to configure a new Jitsi Meet instance can be found at the project webpage.

It is a great solution to invite people to video call through a libre, secure and performing software without requiring any account creation nor software installation, apart from having a browser supporting the webRTC protocol such as Firefox, Chromium or Opera.


Ref: jitsi github, jitsi docs

2014/07/18

How to install python locally


Here is a fast reference to have a local installation of python, mostly useful as a user without root privileges. Pre-built python distributions are also available, e.g., Enthought's Canopy, but we discourage the use of proprietary software since it restricts fundamental user freedoms.


Create a local folders for libraries and executables
mkdir ~/.local
Download python source files, e.g.,
wget https://www.python.org/ftp/python/2.7.8/Python-2.7.8.tar.xz
Untar into ~/src and enter the new python folder.

Configure the python installation
./configure --prefix=$HOME/.local
At this point one can install with
make
make install

Verify that the folders ~/.local/lib/python2.7/site-packages/ and ~/.local/bin/python2.7/ have been created. Finally export the new python path and add an alias in ~/.bashrc
PYTHONPATH="${PYTHiONPATH}:$HOME/.local/lib/python2.7/site-packages/"
export PYTHONPATH
alias python=$HOME/.local/bin/python2.7
Logout the shell. When login again, check the installation with
python --version

Now Python is installed. Let's then proceed to install modules, e.g. Numpy. Download the source files, and copy them in ~/src. Extract and enter the folder. Install the module
python setup.py install --prefix=~/.local
Exit the module source files folder, and verify the installation by checking that
cd ~/
python -c "import numpy"
gives no error. The module is then installed. Proceed similarly for other modules, like scipy of Cython, ipython, matplotlib.

Scipy

Scipy requires the installation of Blas and Lapack libraries, which may also need to be installed locally.

To install Blas:

mkdir -p ~/src/
cd ~/src/
wget http://www.netlib.org/blas/blas.tgz
tar xzf blas.tgz
cd BLAS

## NOTE: The selected fortran compiler must be consistent for BLAS, LAPACK, NumPy, and SciPy.
## For GNU compiler on 32-bit systems:
#g77 -O2 -fno-second-underscore -c *.f                     # with g77
#gfortran -O2 -std=legacy -fno-second-underscore -c *.f    # with gfortran
## OR for GNU compiler on 64-bit systems:
#g77 -O3 -m64 -fno-second-underscore -fPIC -c *.f                     # with g77
gfortran -O3 -std=legacy -m64 -fno-second-underscore -fPIC -c *.f    # with gfortran
## OR for Intel compiler:
#ifort -FI -w90 -w95 -cm -O3 -unroll -c *.f

# Continue below irrespective of compiler:
ar r libfblas.a *.o
ranlib libfblas.a
rm -rf *.o
export BLAS=~/src/BLAS/libfblas.a

To install Lapack:
mkdir -p ~/src
cd ~/src/
wget http://www.netlib.org/lapack/lapack.tgz
tar xzf lapack.tgz
cd lapack-3.5.0/
cp INSTALL/make.inc.gfortran make.inc          # on Linux with lapack-3.2.1 or newer
Then modify make.inc with the following compilation options
OPTS  = -O2 -fPIC
NOOPT = -O0 -fPIC
Now install the library:
make lapacklib
make clean
export LAPACK=~/src/lapack-3.5.0

The export options may be added to ~/.bashrc. Finally, to install scipy, enter the source file directory
python setup.py install --user
and check that the following gives no errors.
cd ~/
python -c "import scipy"
Scipy should then be installed locally.


Matplotlib

Download matplotlib source files. Make sure all the dependencies are installed, in particular: python, numpy, libpng and freetype. For the first two requirement see the description above, while we describe here the remaining dependencies.

To install freetype download the source files. Once extracted, enter the source directory and install locally:
./configure --prefix=$HOME/.local/
make
make install

The same for to install libpng, download the source files and install locally:
./configure --prefix=$HOME/.local/
make check
make install

Finally, add the local executable and library paths to the standard ones in ~/.bashrc:
export PATH=/usr/local/bin:$HOME/.local/:$PATH
export LD_LIBRARY_PATH=~/.local/lib/:$LD_LIBRARY_PATH

Having installed all the dependencies, enter matplotlib source directory and install locally as usual:
python setup.py build
python setup.py install --prefix=~/.local/


Refs:

2013/02/04

How to scp without prompting for password

Whenever you need to use scp (secure copy) to copy files, it asks for passwords. It can get really annoying the fact that the password is asked every time. Fortunately, scp is it's easily scriptable.

Suppose we want to copy the file abc.tgz to an account of a remote machine:
scp abc.tgz user@foo:/documents
We can do it without the need of entering the user password, but still in a secure way thanks to ssh.

  1. First, generate a public/private key pair on the local machine:
    ssh-keygen -t rsa
  2. Then press Enter and leave blank the passphrase (since we don't want one). Your public key has been saved in ~/.ssh/id_rsa.pub
  3. Copy the content of public key id_rsa.pub just generated to the remote machine. You can use scp to make the copy. If you are logging in as a user, it would be in /home/user/.ssh/authorized_keys. Notice that the authorized_keys file can contain keys from other PCs. So, if the file already exists and contains text, you need to append the contents of your public key file to what already is there.

Ref: Linux Journal, Jayakara Kini's Weblog

2012/09/19

Meld as SVN diff

The default Subversion's diff program can be replaced by, e.g., meld. In fact, it may also be used as merge program, but we do not address to this issue here.

To use melt as diff program, open with a text editor the file

~/.subversion/config

and replace or add the line

diff-cmd=meld

Then the command

svn diff -r v1:v2 FILE &

will compare the versions v1 and v2 of FILE using meld.

2012/05/02

Mathematica and SSH


DISCLAIMER: we strongly discourage usage of proprietary software, since it violates fundamental user freedoms.
 
To run Mathematica on a remote machine, e.g., via ssh

$ ssh -X user@machine.domain.com

it is useful to not execute commands using the GUI. In fact, if the network is not optimal (like Internet), the computation would be drastically slowed down. Instead, one should run a Mathematica package via command line.

The steps to evaluate a sequence of Mathematica cells using a script are as follows:
  1. write the program using the Mathematica notebook as usual;
  2. select a cell, copy the content as InputForm, and paste it into a text file;
  3. repeat the step above for all the cells;
  4. save the text file with .m extension.
Then the package can be evaluated as:

$ math -script file.m

Alternatively, one may add a line at the beginning of the script, which will look as follows:

#!/usr/local/bin/MathematicaScript -script

(* output a file containing Cos[x] *)
Export["output.dat",Table[{x,N[Cos[x]]},{x,0,Pi}]]

Then make executable the script:

$ chmod a+x script.m

and run it:

$ ./script.m

To keep the run also without keeping the shell open, use:

$ nohup ./script.m &


Refs: Mathematica Docs, Bergman Lab

2012/03/02

CPU fan on Lenovo Thinkpad T420

Content:

Debian 8


While the fan behaves reasonably under Debian 8, I wanted to increase its usage as I often run short but CPU consuming processes. Thinkfan, originally created to solve the problem of unnecessary  high fan consumption (see the section below about Ubuntu). It provides an easy way in general to control the fan level for given temperature ranges.

Configuration

Install the packages
# apt-get install thinkfan lm-sensors

I encountered an error during installation, which is a known bug. This happens because it tries to load the service before it is properly configured. This error does not prevent the following steps for a proper configuration.
Setting up thinkfan (0.9.2-1) ... Job for thinkfan.service failed. See 'systemctl status thinkfan.service' and 'journalctl -xn' for details. invoke-rc.d: initscript thinkfan, action "start" failed. dpkg: error processing package thinkfan (--configure): subprocess installed post-installation script returned error exit status 1 Errors were encountered while processing: thinkfan E: Sub-process /usr/bin/dpkg returned an error code (1)

Scan the system (answer all the default options)
# sensors-detect

Search for thermal sensors
$ find /sys/devices -type f -name "temp*_input"

My output looks like:
/sys/devices/pci0000:00/0000:00:01.0/0000:01:00.0/hwmon/hwmon3/temp1_input
/sys/devices/virtual/hwmon/hwmon0/temp1_input
/sys/devices/platform/coretemp.0/hwmon/hwmon2/temp3_input
/sys/devices/platform/coretemp.0/hwmon/hwmon2/temp1_input
/sys/devices/platform/coretemp.0/hwmon/hwmon2/temp2_input

Add the devices to the file
/etc/thinkfan.conf 
appending 'hwmon' to each line (in my case I excluded the first line of the previous output), so that the file would look something like this:
hwmon /sys/devices/virtual/hwmon/hwmon0/temp1_input
hwmon /sys/devices/platform/coretemp.0/hwmon/hwmon2/temp3_input
hwmon /sys/devices/platform/coretemp.0/hwmon/hwmon2/temp1_input
hwmon /sys/devices/platform/coretemp.0/hwmon/hwmon2/temp2_input

(0,    0,    55)
(1,    48,    60)
(2,    50,    61)
(3,    52,    63)
(4,    56,    65)
(5,    59,    66)
(7,    63,    32767)

The numbers correspond to:
(LEVEL, LOW, HIGH)
LEVEL is the fan level to use (0-7 with thinkpad_acpi)
LOW is the temperature at which to step down to the previous level
HIGH is the temperature at which to step up to the next level
All numbers are integers.

For more informations see the comments in the template configuration file
/usr/share/doc/thinkfan/examples/thinkfan.conf.simple

Enable the service

Enable the kernel module:
# modprobe thinkpad_acpi fan_control=1

Now that the module parameter fan_control=1 has been given to thinkpad-acpi, the fan levels can be set manually, e.g.:
echo level 4 | sudo tee /proc/acpi/ibm/fan
where the level can be set to an integer between 0 (no fan) 7 (high fan level). Note that level 7 (about 4500 rpm) does not correspond to the maximum speed reachable by the fan. It is possible to increase further the fan usage manually by setting the level to 'disengaged' (about 5500rpm)
echo level disengaged | sudo tee /proc/acpi/ibm/fan
and return back to automatic mode as
echo level auto | sudo tee /proc/acpi/ibm/fan
It is however preferable and more safe to start an automatic service, such as thinkfan, to control the fan level given certain temperature ranges.

Start the thinkfan service:
# systemctl start thinkfan.service

In no error appears, the service should be enabled. The following should inform you that thinkfan is active
$ systemctl status thinkfan.service

You can also check the fan level
$ cat /proc/acpi/ibm/fan
status:        enabled
speed:        1985
level:        1
commands:    level ( is 0-7, auto, disengaged, full-speed)
commands:    enable, disable
commands:    watchdog ( is 0 (off), 1-120 (seconds))

where ' level' is set between 0-7. If instead of being set to a number it is set to 'auto', then probably thinkfan is not active.
or using the command
$ sensors

Finally, load the module at boot:
# echo "options thinkpad_acpi fan_control=1" | sudo tee /etc/modprobe.d/thinkpad_acpi.conf
and enable the service at boot
# systemctl enable thinkfan.service

Avoid overheating

The temperature can still rise significantly (> 90C) when intense CPU usage is required. First, you may want to clean the heat sink. If it does not help, or if to clean the fan you wish anyway to disassemble the machine, it is probably required also the replacement of the thermal paste. Check your hardware maintenance manual to see how to disassemble the heatsink. Other unofficial sources (e.g. videos) may also be useful, but the official manual should be consulted, since this is a potentially dangerous procedure (even if easy).

Apart from mechanical solutions, it is also possible to force a reduced CPU usage. E.g., it may be required that CPUs are loaded only up to 80% of their capacities:
# echo 80 > /sys/devices/system/cpu/intel_pstate/max_perf_pct
A systemd script to set automatically the CPU levels at boot can be downloaded from here. Of course, this is not the optimal long term fix, but it is not invasive and requires no purchase.


Ubuntu 11.10

DISCLAIMER: while we keep this section for reference, we strongly discourage usage of Ubuntu, in particular those versions released between year 2012 and 2016 implementing spyware.

After installing Ubuntu 11.10 on a Lenovo Thinkpad T420, the fan always run too much, even if there is a minimal CPU usage. The solution is installing the package thinkfan, and care attention to wisely configure the fan options.

These steps solve the problem:

1. Install thinkfan package:

$ sudo apt-get install thinkfan

2. Add kernel module ‘coretemp’ to /etc/modules

$ sudo sh -c ‘echo coretemp >> /etc/modules’

3. Load kernel module ‘coretemp’

$ sudo modprobe coretemp

4. Add the following three sensor entries to /etc/thinkfan.conf just before the temperature levels:

sensor /sys/devices/platform/coretemp.0/temp1_input
sensor /sys/devices/platform/coretemp.0/temp2_input
sensor /sys/devices/platform/coretemp.0/temp3_input
sensor /sys/devices/virtual/hwmon/hwmon0/temp1_input


5. Add the following to /etc/modprobe.d/thinkfan.conf: ‘options thinkpad_acpi fan_control=1′

$ sudo sh -c ‘echo “options thinkpad_acpi fan_control=1″ >> /etc/modprobe.d/thinkfan.conf’

6. Reload kernel module ‘thinkpad_acpi’

$ sudo modprobe -r thinkpad_acpi
$ sudo modprobe thinkpad_acpi

7. Set START=”yes” in /etc/default/thinkfan

8. Start thinkfan:

$ sudo /etc/init.d/thinkfan start

9. Check whether it works

$ sudo cat /proc/acpi/ibm/fan

if level has a value between 0 and 7, and changes by times, your thinkfan daemon works.

10. Add thinkfan to startup applications.

Ref: Putokaz, Debian forum and mailing list, thinkwiki, stackexchange

Gnuplot

Basic code to print plots, also using symbols like greek letters:

set term post color eps enh
set output "plot.eps"
set title "{/Symbol abcdefghijklmnopqrstuvwxyz \245}"


See also this page and, in particular, this script.

2011/03/28

PDF editor

DISCLAIMER: while we keep this section for reference, we strongly discourage the use of proprietary software, since it violates fundamental user freedoms.
 
List of PDF editor software under linux:
  • Foxit Phantom PDF, the best choice with Ubuntu 11.10. Versions Suite 2.2.4 and Business Edition 5.0.1 have been reported to work very well with WINE.
  • Xournal, the best choice in my opinion. It turns the PDF file into an image that can be annotated. Then, the file can be exported as PDF;
  • PDFEdit, highly unstable;
  • Okular is the only tool that actually has a real annotation tool for PDFs. However, the annotations are not saved withing the PDF, but written separately. This makes them unusable for any other reader;
  • PDF-XChange Viewer via WINE. Under Fedora 12 it did not work. It works with Ubuntu 11.04 (natty), PDF-XChange Viewer v.2.50.193 and Wine 1.2.

Ref: gnurou, linux.aldeby.org.

2009/12/29

VirtualBox

Installation

The virtualbox-ose package in the official repositories does not support USB peripherals. Hence one can install the non-ose version downloading the deb package from official site, or adding a non-official repository in /etc/apt/sources.list:

# VirtualBox
deb http://download.virtualbox.org/virtualbox/debian jaunty non-free


The authentication key is

wget -q http://download.virtualbox.org/virtualbox/debian/sun_vbox.asc -O- | sudo apt-key add -


and than the package list must be updated.

sudo aptitude update


and the package can be installed

sudo aptitude install virtualbox-3.1


After the insallation

We need to add the user to the vboxusers group:

sudo adduser $LOGNAME vboxusers


sudo -u $USER -s


Than we can enable the usb support:

echo "none /proc/bus/usb usbfs devgid=$(grep plugdev /etc/group | sed 's/plugdev:x:\(.*\):.*/\1/'),devmode=664 0 0" | sudo tee -a /etc/fstab


mount the usb devices

sudo mount /proc/bus/usb


and recompiling the module

sudo /etc/init.d/vboxdrv setup


Ref: Ubuntu Wiki.

2009/08/02

GMPlayer - Errore nella scelta del dispositivo video

Se GMPlayer dà l'errore

Error opening/initializing the selected video_out (-vo) device.

bisogna modificare nel file

~/.mplayer/gui.conf

la riga che riguarda il dispositivo video impostando

vo_driver = "x11"


Ref: ubuntuforums

2009/04/05

Azureus Vuze

N.B. Per le distribuzioni debian la procedura sotto riportata non è più necessaria, basta installare il pacchetto vuze.

Installazione

Installare java

sudo aptitude install sun-java6-jre

Scaricare Azureus Vuze dal suo sito ed estrarre l'archivio di Azureus in /opt:

cd ~/Scrivania (se il file è stato scaricato in ~/Scrivania)
sudo tar xfvj Vuze_Installer.tar.bz2 -C /opt/

e modificare i permessi della directory

sudo chown -R utente:utente /opt/vuze/

dove al posto di utente va il nome dell'utente.

Ottimizzazione condivisione

Una volta aperto Vuze, cliccare su Advanced, andare su Strumenti e quindi Opzioni. Nella scheda Code impostare a 2 download massimi simultanei e massimo numero di torrent attivi.

Protocollo offuscamento

Nella scheda Connessioni, Cifratura di Strumenti → Opzioni, selezionare Richiedi il trasferimento codificato
e Autorizza le connessioni in uscita.

2009/03/14

Creative webcams on Debian and Ubuntu

DISCLAIMER: while we keep this post for reference, we strongly discourage the use of proprietary software, since it violates fundamental user freedoms.


Contents of the post:
  1. Creative Live! Cam Vista IM and Skype (Ubuntu 10.10+)
  2. Creative Live! Cam Vista IM (Debian Lenny e Ubuntu)
  3. Creative WebCam Live! (Ubuntu 8.10)

Creative Live! Cam Vista IM and Skype (Ubuntu 10.10+)

In order to make the webcam also compatible with Skype, one needs to install the gspca driver and libv4l.

Installing needed packages:
sudo aptitude install mercurial build-essential linux-headers libncurses5-dev
Retrieving sources (from Douglas Schilling Landgraf V4L/DVB backports repository):
hg clone http://linuxtv.org/hg/v4l-dvb/
Copy the configuration file:
cd v4l-dvb
sudo cp /boot/config-`uname -r` v4l/.config

Note: currently FireDTV drivers do not compile easily (you need all the kernel sources) and are rarely used, we will disable them in the configuration.
Launch configuration:
sudo make menuconfig
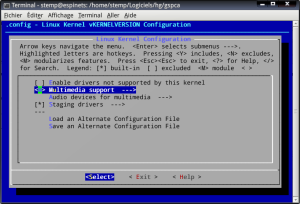
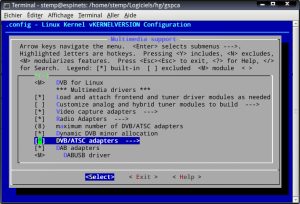
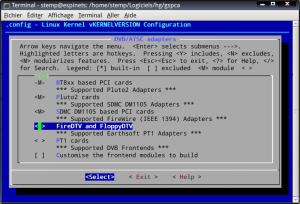
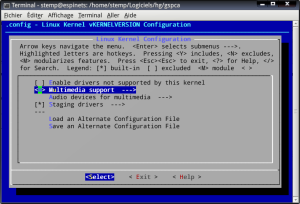
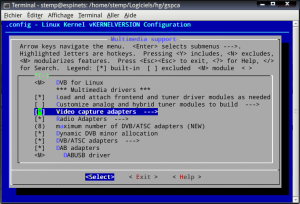
Disable FireDTV support (Multimedia Support -> DVB/ATSC adapters -> set the option blank on FireDTV and FloppyDTV):
Capture-4
Capture-5
Capture-6
Exit, Exit.
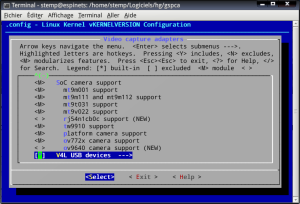
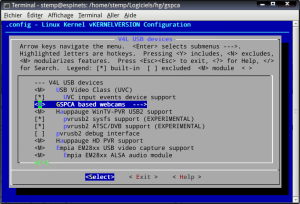
Now let’s take care of usb webcams (Multimedia Support -> Video Capture adapters -> V4L USB devices)
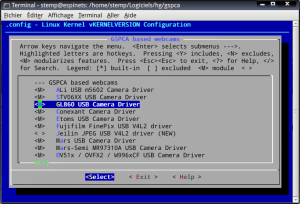
Activate new modules drivers (press M on those marked NEW), in gspca for example:
Capture-4
Capture-7
Capture-8
Capture-9
Capture-10
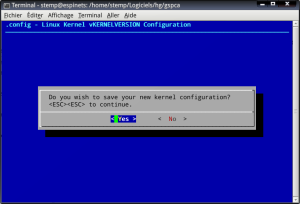
Once the new drivers are enabled (M for module instead of a space), we can leave. Exit, Exit, etc… and save:
Capture-11
Launch the compilation:
make
sudo make install
If everything ok go to the next step, because the drivers also require the latest versions of libv4l.
For karmic it’s easy:
sudo add-apt-repository ppa:libv4l
Get the latest version if necessary:
sudo aptitude update
sudo aptitude full-upgrade


In order to load skype with the new drivers:

cd /usr/bin
sudo mv skype skype.real
gksudo gedit skype
add the following lines

#!/bin/sh
LD_PRELOAD=/usr/lib/libv4l/v4l1compat.so /usr/bin/skype.real "$@"
and make exxecutable the file

sudo chmod +x skype
Restart and enjoy your new drivers.

Ref: Le bazar de Stemp, Ispirazioni Informatiche .

Older versions

N.B. Con i kernel 2.6.27.xx le procedure sotto riportate falliscono. Esse si riferiscono ai kernel 2.6.24.xx.


Creative Live! Cam Vista IM (Debian Lenny e Ubuntu)

Scaricare il driver ov51x-jpeg (ad esempio tramite subversion)

sudo aptitude install subversion
mkdir webcam-driver
svn co svn://rastageeks.org/svn/ov51x-jpeg/trunk webcam-driver

compilare

cd webcam-driver
sudo aptitude install linux-headers-`uname -r`
make
sudo make install
sudo modprobe ov51x-jpeg

installare il modulo del pacchetto

sudo aptitude update
sudo aptitude install ov51x-jpeg-source module-assistant
module-assistant a-i ov51x-jpeg

Per utilizzare la webcam con skype (versione 2.0.0.72) è necessario forzare un parametro all'avvio, inserendo nel file /etc/modprobe.d/options la seguente riga

options ov51x-jpeg forceblock=1

Nel caso di Ubuntu 8.04 o 9.04 è inltre necessario installare libv4l

sudo aptitude install libv4l-0


e lanciare skype con il comando

LD_PRELOAD=/usr/lib/libv4l/v4l1compat.so skype

Conviene quindi rinominare l'eseguibile

sudo mv /usr/bin/skype /usr/bin/skype.real

e creare un file

sudo nano /usr/bin/skype

inserendo la riga

LD_PRELOAD=/usr/lib/libv4l/v4l1compat.so /usr/bin/skype.real

e renderlo eseguibile

sudo chmod 775 /usr/bin/skype


Ref: ubuntu forums, rastageeks, fireteam.


Creative WebCam Live! (Ubuntu 8.10)

La Creative WebCam Live! viene riconosciuta da ubuntu 8.10 e funziona correttamente con alcuni programmi come Cheese, ma skype 2.0.0.72 , pur riconoscendola, mostra una schermata verde invece del video.
E' quindi necessario installare il pacchetto libv4l (o lib32v4l per la versione amd64)

sudo aptitude install libv4l

rimuovere skype se già installato

sudo aptitude purge skype

e installare i repository Medibuntu

sudo wget http://www.medibuntu.org/sources.list.d/intrepid.list --output-document=/etc/apt/sources.list.d/medibuntu.list

aggiungendo anche la chiave GPG

sudo apt-get update && sudo apt-get install medibuntu-keyring && sudo apt-get update

e quindi reinstallare skype da questo repository

sudo aptitude install skype


Ref: Ispirazioni Informatiche.


2009/01/12

Rete tra più PC

E' possibile condividere files tra due o più PC tramite NFS.

Dopo avere riconosciuto l'interfaccia di rete

sudo ifconfig

bisogna impostare un IP fisso su ogni computer (qui l'interfaccia è eth0):

sudo ifconfig eth0 192.168.1.1

dove l'ultimo numero deve variare a seconda del PC.


SERVER (192.168.1.1)
Installare NFS server

sudo aptitude install nfs-kernel-server nfs-common portmap

Durante la configurazione di portmap non fare il binding loopback.
Se le cartelle da condividere sono /Dati/musica in lettura e /Dati/testi in lettura e scrittura, allora aggiungere a /etc/exports le righe

/Dati/musica 192.168.1.1/24(ro,async)
/Dati/testi 192.168.1.1/24(rw,no_root_squash,async)

dove si possono anche indicare degli IP specifici invece di 192.168.1.1/24.
Riavviare il server NFS

sudo /etc/init.d/nfs-kernel-server restart

Se si cambiano le condivisione bisogna dare

sudo exportfs -a


CLIENT
Installare NFS client

sudo aptitude install portmap nfs-common

Se /media/musica e /media/testi sono le cartelle in cui montare quelle condivise, allora bisogna inserire in /etc/fstab le righe

192.168.1.1:/Dati/musica /media/musica nfs ro,user,noauto 0 0
192.168.1.1:/Dati/testi /media/testi nfs rw,user,noauto 0 0

dove ro e rw si riferiscono alle cartelle in sola lettura e in lettura/scrittura rispettivamente.
Montare le cartelle con

sudo mount /media/musica & sudo mount /media/testi

Per montarli automaticamente all'avvio utilizzare auto invece di noauto.


Ref: Senbee's Blog

2008/11/22

Risoluzione e frequenze di refresh - xorg.conf

Può succedere che gli strumenti appositi del DE utilizzato non riportino la risoluzione dello schermo desiderata, e che nemmeno il comando

sudo dpkg-reconfigure xserver-xorg

permetta di scegliere le risoluzioni. Spesso questo problema è legato alle frequenze di refresh orizzontale e/o verticale. Bisogna quindi munirsi delle specifiche del monitor (qui per Acer AC713) utilizzato e modificare /etc/X11/xorg.conf, inserendo le frequeze di refresh nella sezione monitor, e le risoluzioni desiderate in una sottosezione della sezione screen:

Section "Device"
Identifier "Configured Video Device"
EndSection

Section "Monitor"
Identifier "Configured Monitor"
HorizSync 30.0 - 72.0
VertRefresh 50.0 - 160.0
EndSection

Section "Screen"
Identifier "Default Screen"
Monitor "Configured Monitor"
Device "Configured Video Device"
SubSection "Display"
Modes "1280x1024" "1024x768" "832x624" "800x600"
EndSubSection
EndSection


Ref: forum ubuntu-it

2008/10/25

Macro root per sottrarre il fondo

La seguente macro per root (cern) crea un istogramma, sum, che è la sottrazione di due istogrammi, h2 e h2_noise, normalizzati tramite i fattori di scala scale1 e scale2 rispettivamente. h2 e h2_noise sono riempiti con i valori dei rami etichettati con ch2 nelle ntuple relative allo spettro (spectrum.root) e al fondo (noise.root) rispettivamente.


#if !defined(__CINT__) || defined(__MAKECINT__)
#include <riostream.h>
#include <stdlib.h>
#include <troot.h>
#include <tarrayi.h>
#include <tbranch.h>
#include <tcanvas.h>
#include <tclasstable.h>
#include <tclonesarray.h>
#include <tfile.h>
#include <tgeomanager.h>
#include <th1.h>
#include <th2.h>
#include <tstopwatch.h>
#include <tmath.h>
#include <tsystem.h>
#include <trandom.h>
#include <tinterpreter.h>
#include <tobject.h>
#include <tobjarray.h>
#include <ttree.h>
#include <tchain.h>
#include <tcanvas.h>
#include <tview.h>
#include <tntuple.h>
#include <tpolymarker3d.h>
#include <tfile.h>
#endif

void noise(char* infile1="sp_urto_Al.root",char* infile2="sp_urto_fondo.root", float scale1=1,float scale2=1.55)

{
float ch2;
int nentries;

TH1F *h2 =new TH1F("h2","h2",2048,0,2048);
TH1F *h2_noise =new TH1F("h2_noise","h2_noise",2048,0,2048);

TFile *fin=new TFile(infile1);
pjmca->SetBranchAddress("ch2",&ch2);
nentries=pjmca->GetEntries();
for(int i=0;i<nentries;i++){
pjmca->GetEntry(i);
h2->Fill(ch2);
}
h2->Scale(scale1);

TFile *fin=new TFile(infile2);
pjmca->SetBranchAddress("ch2",&ch2);
nentries=pjmca->GetEntries();
for(int i=0;i<nentries;i++){
pjmca->GetEntry(i);
h2_noise->Fill(ch2);
}
h2_noise->Scale(scale2);

TH1F *sum =new TH1F("sum","fondo sottratto",2048,0,2048);
sum->Add(h2,h2_noise,1,-1);


//Draw spectrum, noise, spectrum without noise:
//h2->SetLineColor(kGreen);
//h2->Draw();
//h2_noise->SetLineColor(kRed);
//h2_noise->Draw("same");
//sum->Draw("same");

//Draw spectrum without noise:
sum->Draw();
}

2008/10/16

Leggere DVD

DISCLAIMER: we strongly discourage usage of proprietary software, since it restricts fundamental user freedoms.
 
Il DVD è un formato proprietario. Per leggerlo è quindi necessario installare delle apposite librerie: libdvdcss2.
Ad esempio, con Ubuntu 7.10, si può abilitare il repository Medibuntu, scaricando la chiave per autenticare i pacchetti:

wget -q http://packages.medibuntu.org/medibuntu-key.gpg -O - | sudo apt-key add -

e aggiungendo i repository alla lista:

sudo wget http://www.medibuntu.org/sources.list.d/gutsy.list -O /etc/apt/sources.list.d/medibuntu.list

Si può quindi installare il pacchetto

sudo apt-get install libdvdcss2

In alternativa, si può eseguire lo script

sudo /usr/share/doc/libdvdread3/install-css.sh

Per leggere il dvd con vlc: File → Apri File → Disco
Selezionare DVD (menu) (così verrà visualizzato anche il menù del dvd), e quindi la periferica (ad esempio /cdrom).

Ref: Ubuntu-it: Formati proprietari, Repository non ufficiali.

2008/09/06

Broadcom wireless bcm4312 - Ubuntu 8.04

DISCLAIMER: while we keep this post for reference, we strongly discourage the use of proprietary software, since it violates fundamental user freedoms.


Installazione tramite ndiswrapper dei driver della scheda mini Dell™ Wireless 1395 802.11b/g (Broadcom wireless bcm4312) su una Ubuntu 8.04.

Individuare il chipset della periferica tramite

lspci

e reperire i driver per Windows (prefiribilmente XP), ad esempio qui

wget http://ftp.us.dell.com/network/Dell_multi-device_A17_R174291.exe

da salvare in una cartella temporanea. Installando cabextract

sudo aptitude install cabextract

si possono estrarre i driver

cabextract Dell_multi-device_A17_R174291.exe

(oppure si può utilizzare wine per eseguire il file .exe).
Nella cartella devono essere presenti il file .inf ma anche .sys e .bin (o .cat?).

Installare ndiswrapper:

sudo aptitude install ndiswrapper-utils-1.9 ndiswrapper-common

Mettere in blacklist eventuali moduli incompatibili

echo 'blacklist bcm43xx' | sudo tee -a /etc/modprobe.d/blacklist

installare i drivers

sudo ndiswrapper -i bcmwl5.inf
ndiswrapper -l


Se i driver sono stati installati correttamente, il risultato di quest'ultimo comando dovrebbe essere simile a

bcmwl5 : driver installed
device (14E4:4315) present (alternate driver: wl)

Caricare il modulo di ndiswrapper

sudo depmod -a
sudo modprobe ndiswrapper
sudo cp /etc/network/interfaces /etc/network/interfaces.orig
echo -e 'auto lo\niface lo inet loopback\n' | sudo tee /etc/network/interfaces


caricare il modulo all'avvio

sudo ndiswrapper -m
echo 'ndiswrapper' | sudo tee -a /etc/modules
echo 'ENABLED=0' | sudo tee -a /etc/default/wpasupplicant

e, nel caso fosse installato

sudo aptitude remove b43-fwcutter

Creare uno script, aprendo

gksu gedit /etc/init.d/wirelessfix.sh

e copiandovi le seguenti righe

#!/bin/bash
modprobe -r b44
modprobe -r b43
modprobe -r b43legacy
modprobe -r ssb
modprobe -r ndiswrapper
modprobe ndiswrapper
modprobe b44


Aggiustare i permessi e renderlo operativo

cd /etc/init.d/ && sudo chmod 755 wirelessfix.sh
sudo update-rc.d wirelessfix.sh defaults


Riavviare il computer e verificare che
sudo iwconfig
identifichi una nuova interfaccia (ad esempio eth1 o wlan0, ma il nome può variare).

Ref: danny block notes; wiki ubuntu-it;

2008/08/23

Trasformata Fourier di immagini

Grazie ad un plugin di gimp si possono ottenere in modo immediato le trasformate di fourier di immagini.
Bisogna installare i pacchetti fftw3 e libgimp2.0-dev per poter compilare il fourier GIMP plugin. Il README che accompagna il codice sorgente dà tutte le istruzioni necessarie per l'installazione:

# make && make install

(in realtà make è inutile, come si vede dall'output
make: Nothing to be done for 'all'
ossia non c'è bisogno di compilare, bisogna solo installare con make install)

e per utilizzare il plugin, semplicemente scegliendo dal menù principale di gimp:
Filters/Generic/Forward FFT
Filters/Generic/Inverse FFT

Ref: RP.

2008/07/30

Cambiare permessi ad un file

Per cambiare i permessi ai file:
$ chmod [references][operator][modes] file1 ...
dove le possibili references sono:
  • u user
  • g group
  • o others
  • a all (=ugo)
Queste devono essere seguite da degli operators:
  • + aggiunge alle classi sopra riportate i modi sotto riportati
  • - rimuove alle classi sopra riportate i modi sotto riportati
  • = i modi specificati saranno i modi esatti per le classi specificate
che aggiungono/rimuovono i modes:
  • r read
  • w write
  • x execute
  • X vedi qualche guida
  • s vedi qualche guida
  • t vedi qualche guida
Per verificare i permessi di un file:
$ ls -l file

Esempio: dare permessi di lettura e scrittura per il proprietario del file e per i membri del gruppo del file:
$ chmod ug+rw esempio
$ ls -l esempio
-rw-rw-r-- 1 francesco francesco 10 2008-07-30 19:54 esempio


Ref: wikipedia.

2008/07/21

DHCPDISCOVER e MTA al boot

Per evitare che dhcp al boot cerchi di impostare i parametri di rete (inutile se si usa una connessione adsl), commentare la riga

auto eth0

del file /etc/network/interfaces.

Se invece ci si connette ad una rete locale, bisogna tenere questa riga. In alternativa, si può usare il comando

# ifup eth0

Può capitare inoltre che, al boot, exim4 (ossia l'MTA) cerchi per un lungo periodo di tempo di trovare un indirizzo DNS. Per evitare di perdere questo tempo sul messaggio

Starting MTA: exim4

si può lanciare

# dpkg-reconfigure exim4-config

rispondendo yes alla domanda Keep number of DNS-queries minimal (Dial-on-Demand)?. In effetti, però, spesso è conveniente addirittura disattivare exim. Con gnome basta andare su system → administration → services e togliere il tick a Mail agent (exim4). Nel caso dovesse servire basta riattivarlo.

Ref: mailing-list debian-italian; wiki-debian.